 Home in Block
Inside a Kitchen Renovation, From First Plan to Final Reveal
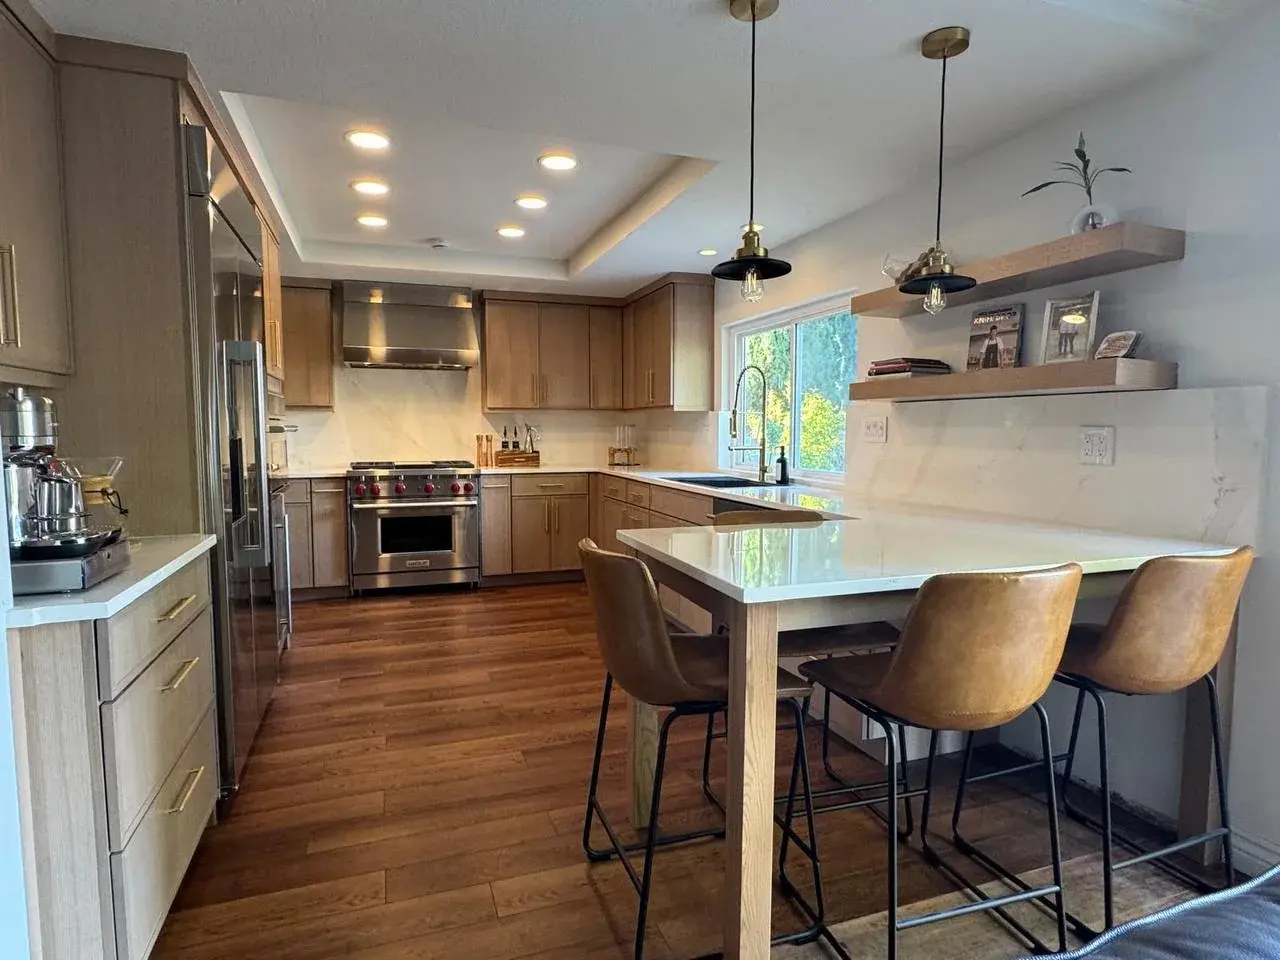
Most of a kitchen renovation happens long before anyone sees the finished room. This is the story of one family kitchen in California, told through the plans and photographs from the project. Every home is different, so take it as one real example and a general guide, not a fixed recipe.
1. Start with how the kitchen is used
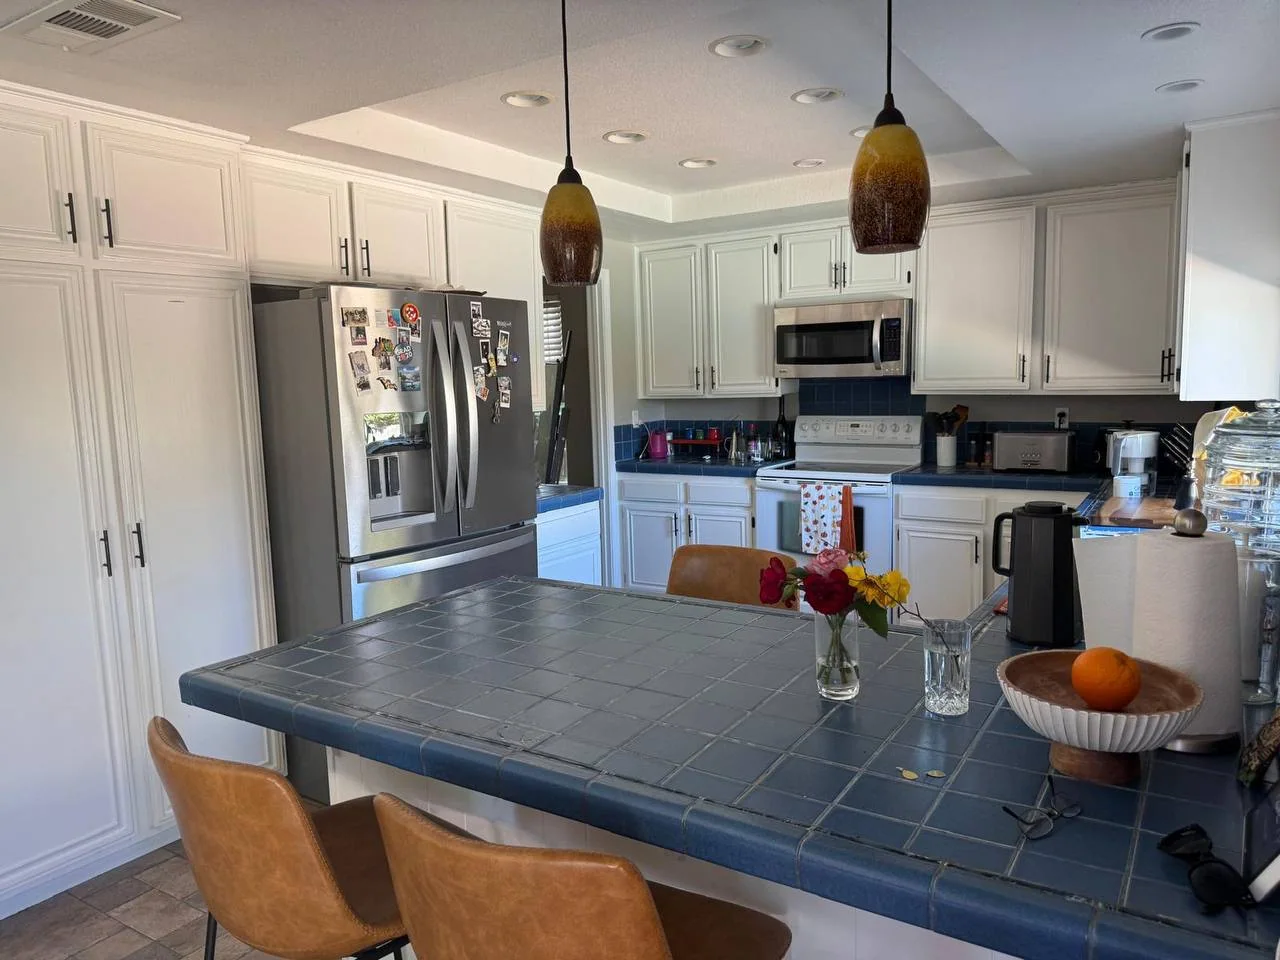
This is where we began, with white cabinets and a dark tiled counter. The brief was a kitchen that looked modern and clean, made better use of the space, and gave the family somewhere to gather and sit down for breakfast.
Before you think about finishes, write down what works today, what gets in your way, and how many people use the room at once.
2. Measure, then draw the plan
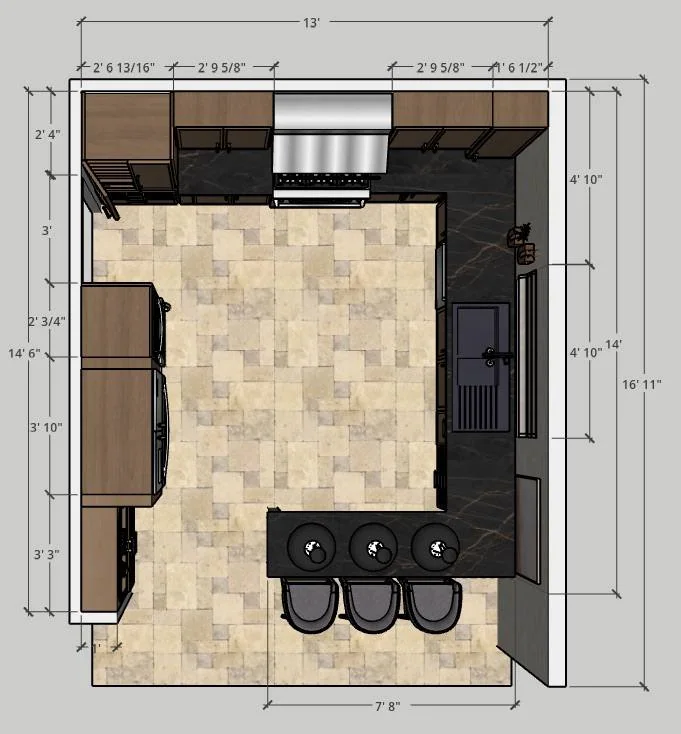
Everything that follows depends on accurate measurements of the walls, windows, doors and ceiling. A plan drawn to scale shows whether the appliances fit, whether people can pass each other, and where seating can go.
3. See it in 3D
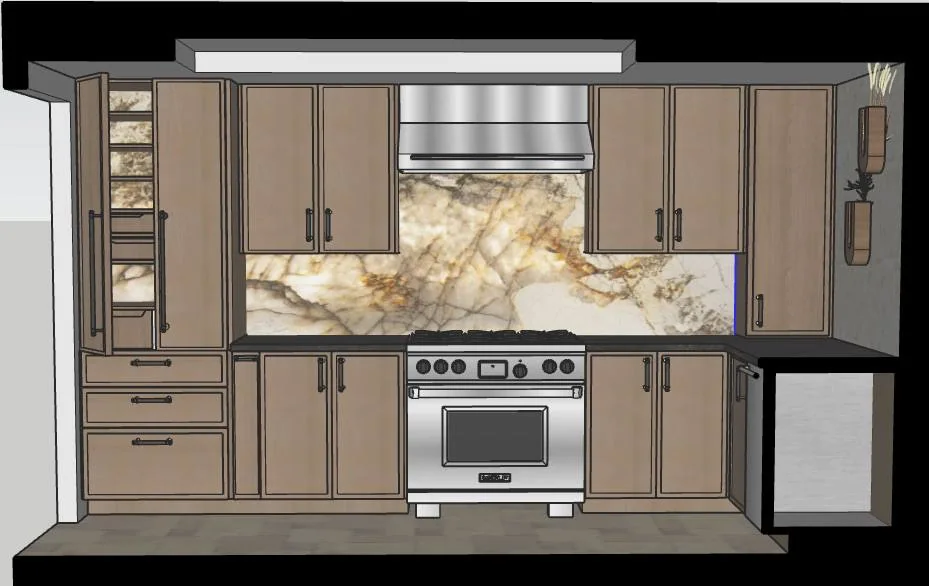
Next I built the kitchen as a computer model in SketchUp and looked at it wall by wall. This is where cabinet proportions, appliance positions and storage get worked out.
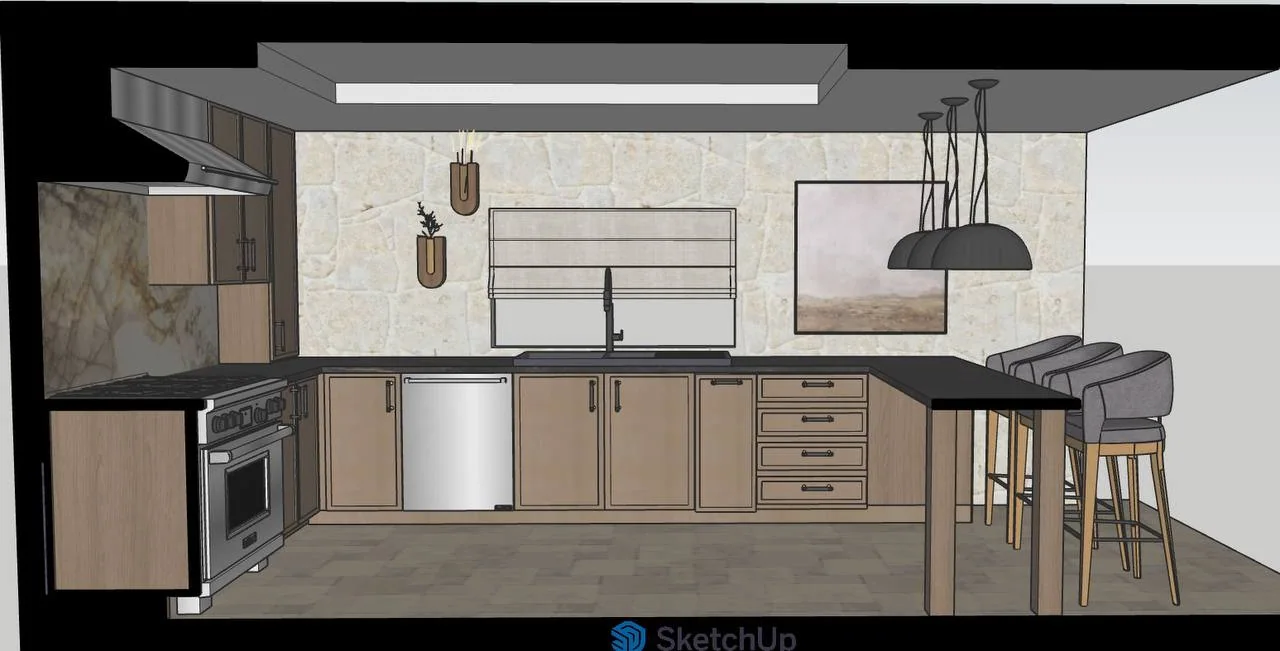
4. Compare ideas while they are still easy to change
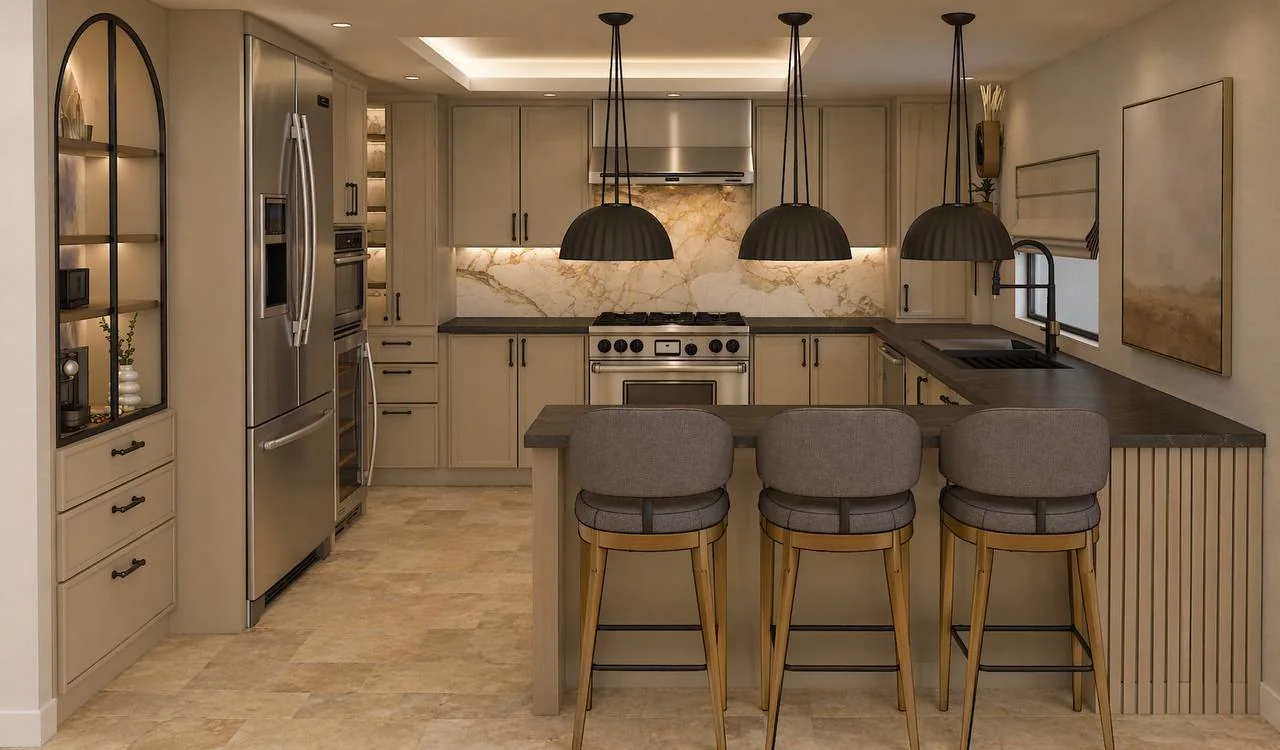
Renders turn the model into something you can react to. We could compare an island with stools against a banquette before anything was ordered.
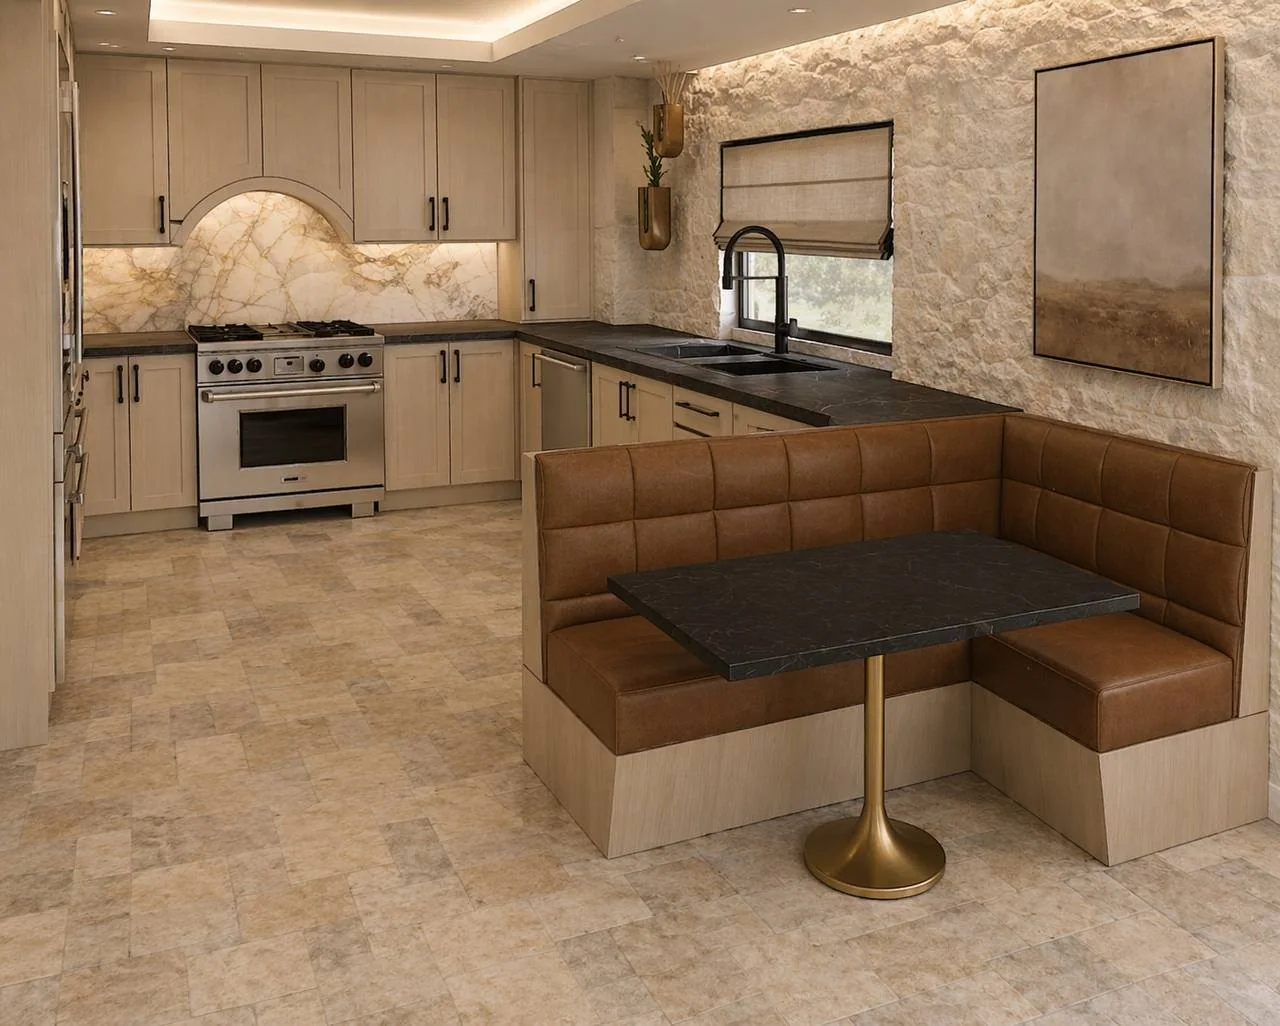
The finished kitchen ended up lighter than these early versions, with a breakfast peninsula instead of either one. That is what this stage is for. Changing your mind on a screen costs far less than changing it on site.
5. Choose materials and set a budget
Cabinets, counters, flooring, appliances and lighting all need choosing, ideally with samples side by side in the room's own light. Ask for lead times early, because some items take a long time to arrive and can hold up the whole job. It is also wise to keep a contingency for surprises once the walls are open.
6. Find the right contractors
The best design still depends on the people who build it. In general, this is what I suggest:
- Ask to see recent work similar to yours, and speak to past clients.
- Check their licensing and insurance.
- Get detailed written quotes based on the same drawings, so you are comparing like with like.
- Ask who handles permits, and who is in charge on site day to day.
- Agree the schedule and how changes will be priced before work starts.
7. Clear the room
Demolition is fast and a little alarming. The old kitchen comes out, sometimes down to the subfloor as it did here. This is when hidden problems tend to appear, and when electricians and plumbers move wiring and pipes to suit the new plan, before the walls are closed up and patched.
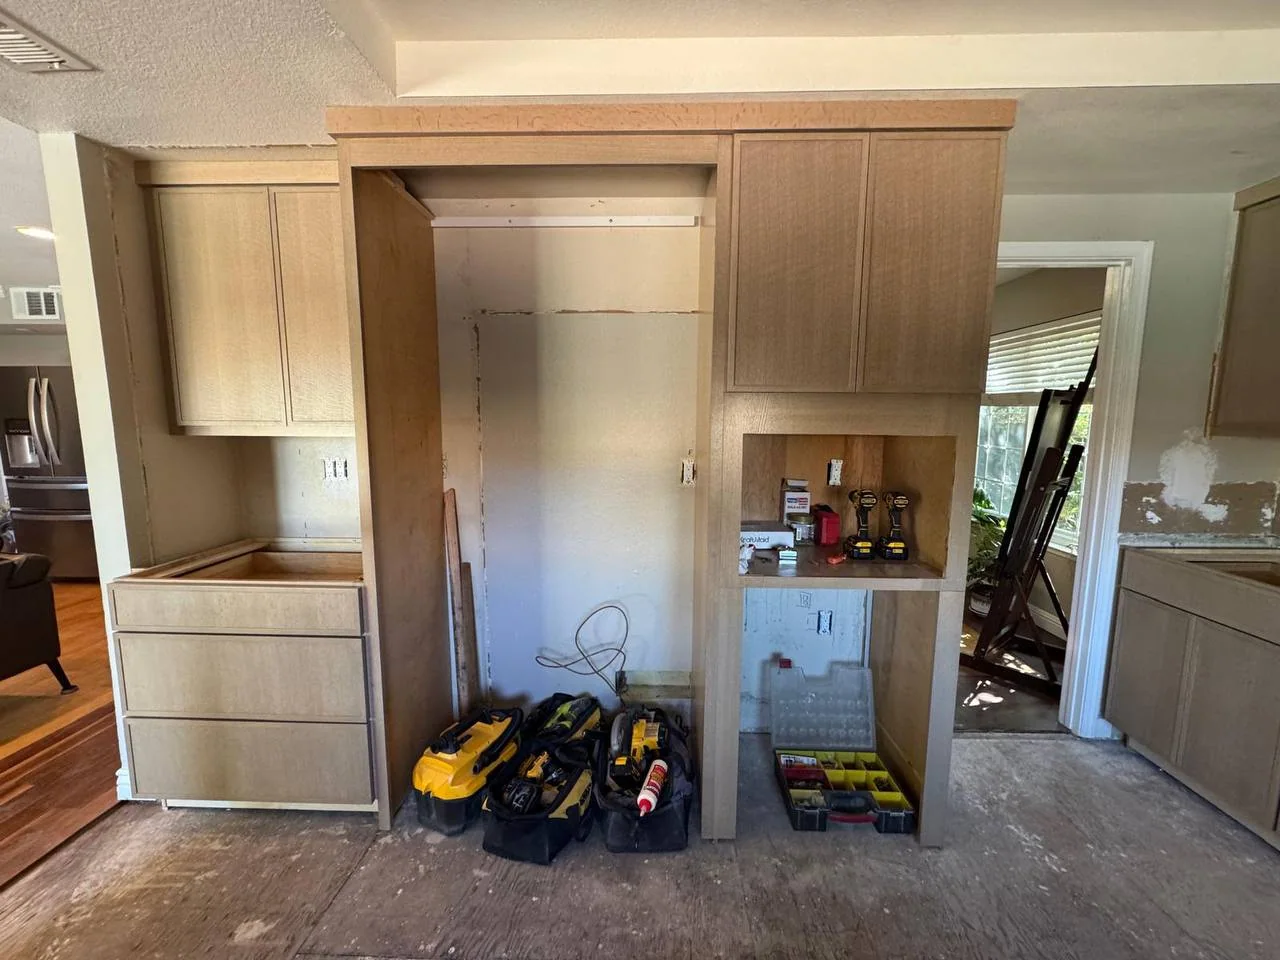
8. Install the cabinets
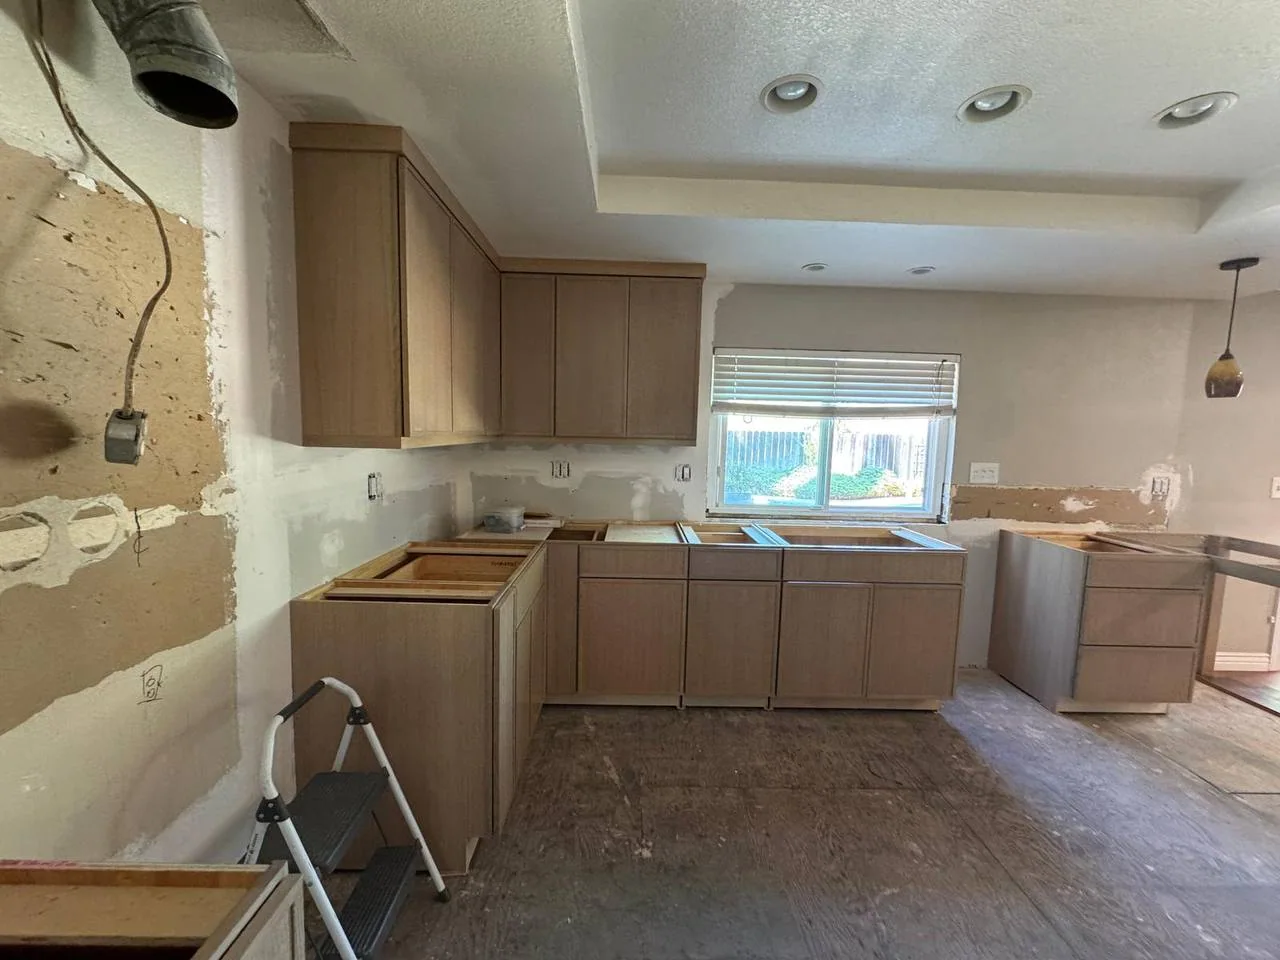
Cabinets are the moment the kitchen starts to look like the drawings. The tall units around the refrigerator and ovens form a single built-in wall.
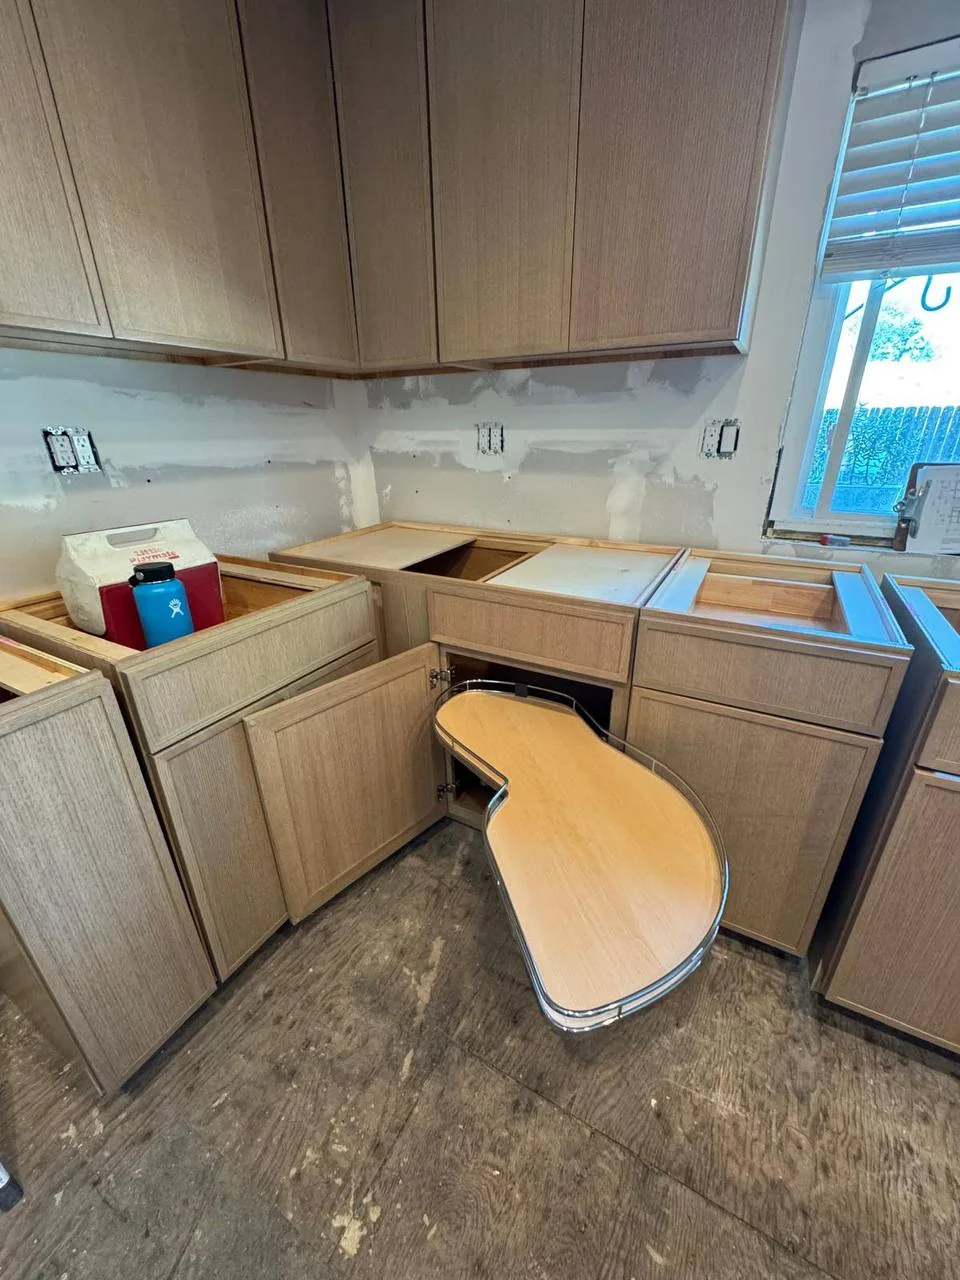
Small decisions matter here too. A corner cabinet with a pull-out shelf makes use of space that would otherwise be hard to reach.
9. Build in the details
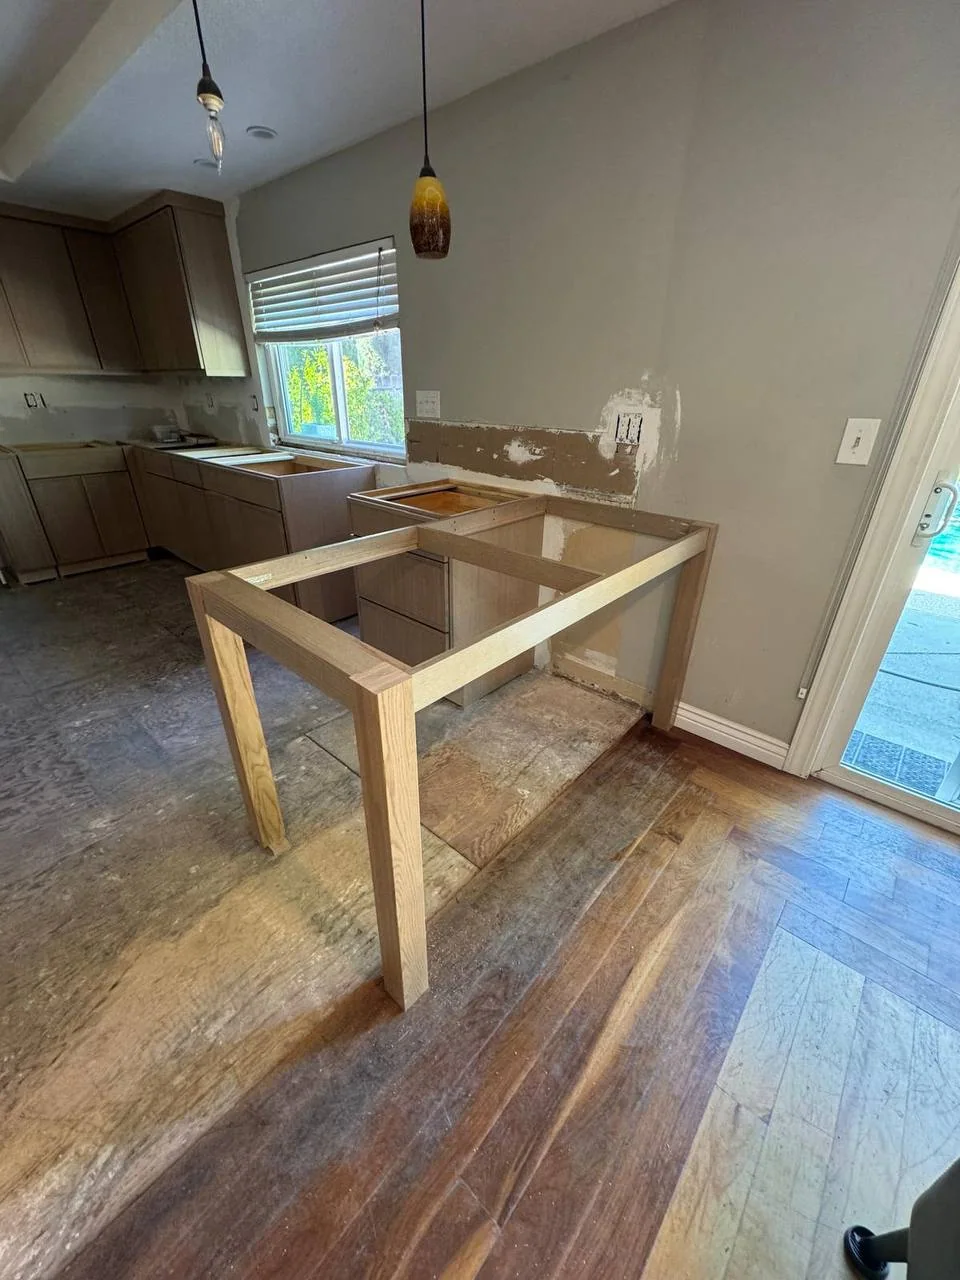
The breakfast peninsula began as a simple frame. Counters are usually measured once the cabinets are in place, so they fit exactly what was built. Then come the backsplash, flooring, hardware and fixtures. Each trade follows the last, so a delay in one can move everything after it.
10. Finish, check and enjoy
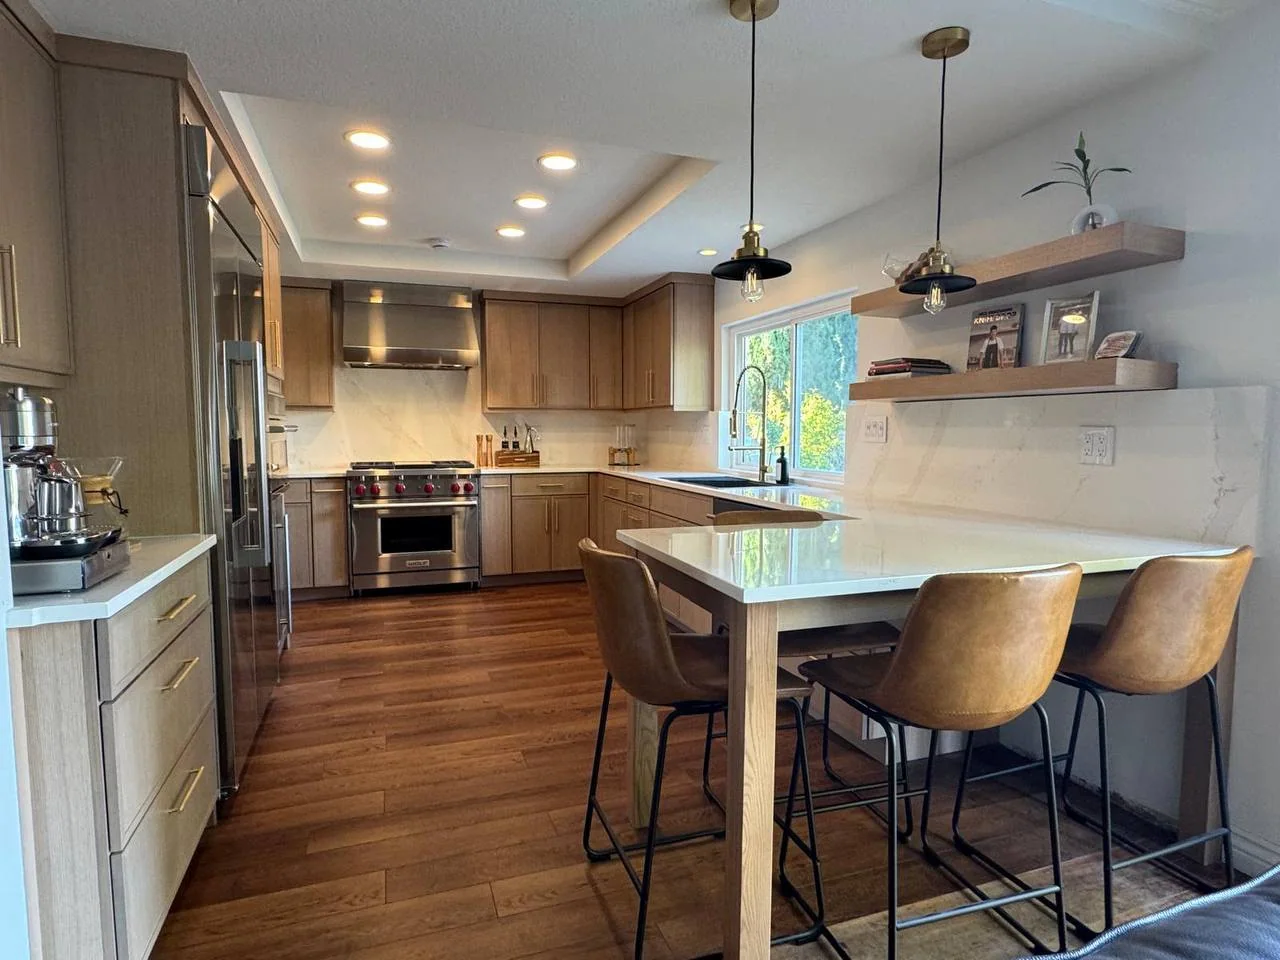
Last come the lights, appliances, shelves and a careful walk through the room to list anything that needs fixing before the job is signed off.
The result is what the family asked for at the start: a clean, modern kitchen that makes better use of the space, with a place to sit down together.
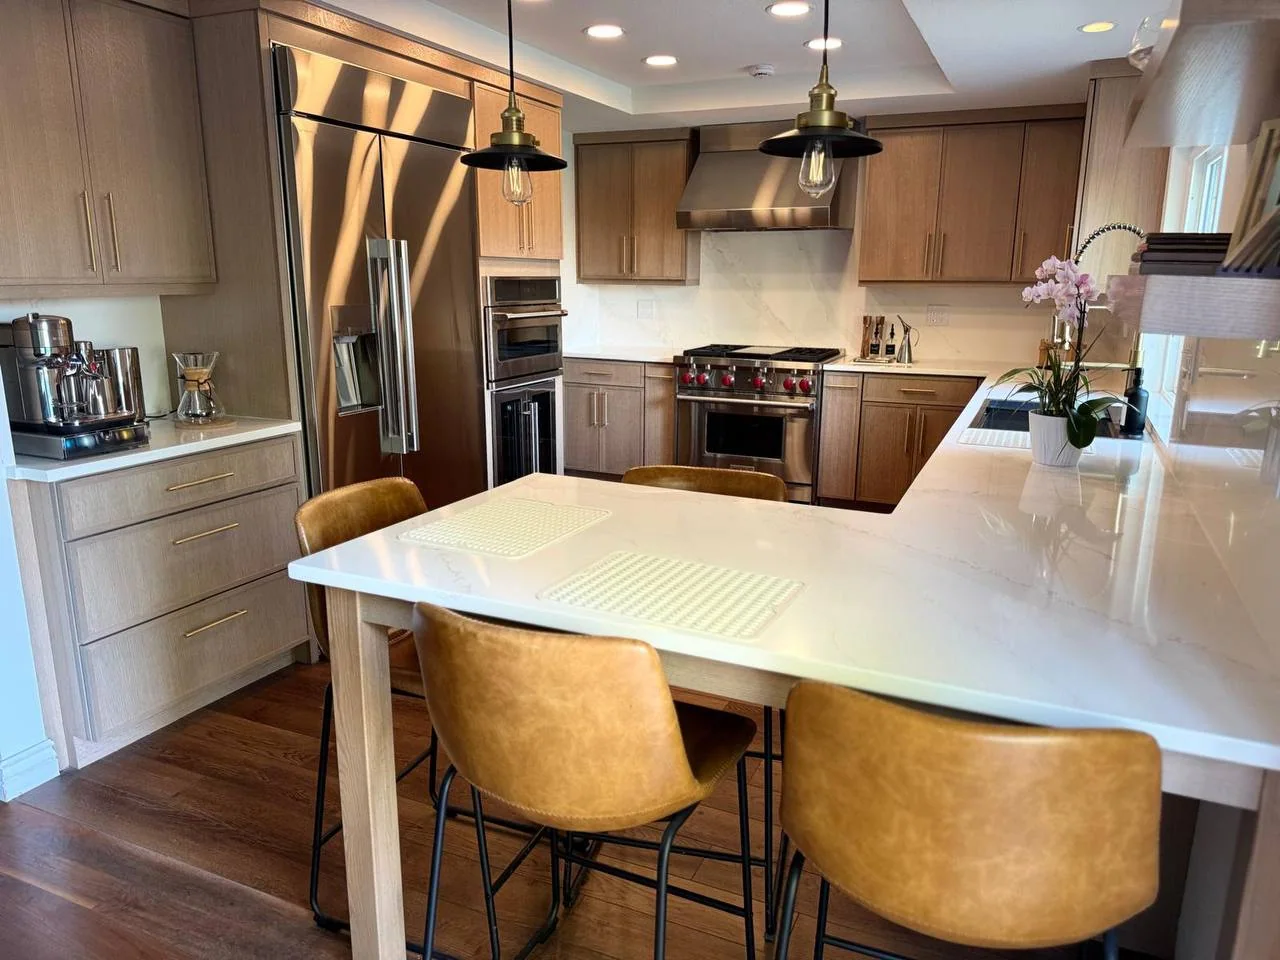
You can see more of it on the project page. If you are planning a kitchen of your own, I would love to hear about it.